YII修改CGridView默认排序

CSort里面是有一个defaultOrder的属性,但是GII自动生成的CURD不能这么来;后来找到个帖子(Model Search - Merging in a default start criteria),里面写的比较详细。但是他在Controller里面的条件判断需要改下。

$merge = new CDbCriteria;
if(empty($_GET['Depart_sort'])) {
	$merge->order = 'displayorder DESC';
}

主要的流程就是:

  1. 在控制器里面判断用户是否有指定排序字段,若没有则加上默认排序字段
  2. 传变量到模版里,由用户浏览页面,执行search
  3. model里面合并criteria的order条件

PolicyServer

最近做一个项目需要用到websocket,但是目前ie9及之前的版本都不支持,github上面出现了用flash模拟websocket的开源项目,由于使用flash时,flash是有权限限制的(这应该是为了安全性考虑),xmlsocket://会先访问843端口,获取授权文件。于是自己用python写了个,该程序依赖tornado库。http://inote.github.com/PolicyServer/

inotify-tools安装

前提

# 查看内核是否支持inotify机制
grep INOTIFY_USER /boot/config-$(uname -r)

下载安装

# https://github.com/rvoicilas/inotify-tools/
wget ...
tar zxf ...
# 若是没有configure文件,先运行
# ./autogen.sh
./configure --prefix=/usr/local/inotify
make && make install

基础的使用

inotifywait -rme modify,attrib,move,close_write,create,delete,delete_self /etc/asterisk

chrome下固定定位元素在锚点跳转时显示不全

做项目时遇到两次,就纪录下来。(仅在chrome下出现此bug)

产生条件:

  • 1.锚点链接上绑定了点击事件;

现象:

在chrome下测试发现,绝对定位的元素只显示一部分,但是稍微滚动滚动条或者改变窗口大小后又正常了。

原因:

个人觉得:跟浏览器渲染,在点击页面内锚点时触发了默认的跳转锚点的动作和绑定的click事件,两个同时执行后绝对定位元素渲染出bug

解决方案:

  • 1.点击事件内加return false来阻止默认行为;(可行性不高,因为阻止了锚点跳转,但是也能解决显示不全的问题)
  • 2.绑定的事件写在setTimeout内,延迟执行;(能满足大部分需求)

演示代码:

DEMO

php杂记2

glob函数

// 获取所有php和txt文件,必须指定第二个参数为GLOB_BRACE才能使用{}
$files = glob('*.{php,txt}', GLOB_BRACE);

// 按照文件的修改时间排序
usort($files, create_function('$a,$b', 'return filemtime($a) - filemtime($b);'));

RecursiveDirectoryIterator

// 深度遍历文件夹
$path = realpath('/etc');

$objects = new RecursiveIteratorIterator(new RecursiveDirectoryIterator($path), RecursiveIteratorIterator::SELF_FIRST);
foreach($objects as $name => $object){
    echo $name . PHP_EOL;
}

PHP5.3下SQLSTATE[HY000] [2002] 非法的参数解决方案

将localhost改成127.0.0.1

来自:链接

SmartMarkdown插件bug

bug描述

SmartMarkdown是Sublime Text2的一个插件,该插件提供了smart table的功能,该功能在只有ascii字符的时候很完美,但当内容中出现中文,中文标点的时候就会产生错位,这是因为中文在屏幕上的显示占了两倍的英文所占有的位置。

bug修复

由于该插件里面计算的时候是按照字符的长度来计算的,所以他把中文字符串的长度也是计算为1的。我们要做的就是把非ascii字符串替换为两个占位字符,然后计算长度。找到插件目录下的table.py

# 21行添加
NONE_ASCII_PATTERN = re.compile(r'[^\x00-\xff]')
# 124行修改为
new_row.append(col + " " * (cols_length[i] - len(NONE_ASCII_PATTERN.sub('  ',col))))
# 163行修改为
col_len = len(NONE_ASCII_PATTERN.sub('  ', col))

修改过的文件:下载

CentOS一些配置及系统信息文件

大概三个月前,在公司做了个系统管理的程序(时间设置,网卡设置,系统时间设置,等等),现在记录下这些文件的路径,备忘。

# 网络默认参数
/etc/sysconfig/network

# dns
/etc/resolv.conf

# 单个网卡
/etc/sysconfig/network-scripts/ifcfg-eth*

# 登录系统时的提示信息
/etc/issue

# 登陆后的提示信息
/etc/motd

# 系统版本
/etc/redhat-release

# 时区
/etc/localtime
/usr/share/zoneinfo/*

/etc/sysconfig/clock

利用百度地图API拆分纯真IP数据库地址

导出txt,并转码

利用安装后的ip.exe导出txt文件,由于python处理gbk中文的时候会有些问题,所以我们直接选个编辑器打开之后,再以utf-8的编码保存就可以了。

提取所有地址

由于我们需要通过百度地图的API一个地址一个地址的查询,所以去除重复的地址可以减少我们的查询量。

# coding: utf-8
# python的去重方法很多,这里我们选用set类型
with open('ipdata.txt', 'r', encoding='utf-8') as handle:
    regex = re.compile(' +')
    addrs = set([])
    for line in handle:
        if line.strip() != '':
            address = regex.split(line.strip())[2]
            addrs.add(address)
    # addrs 就是我们过滤之后的所有地址了

上面我们已经过滤出所有的地址了,接下来就是使用百度的API来拆解这些地址。

import re, urllib, time, json
from urllib import parse, request

with open('ipdata.txt', 'r', encoding='utf-8') as handle:
    regex = re.compile(' +')
    addrs = set([])
    for line in handle:
        if line.strip() != '':
            address = regex.split(line.strip())[2]
            addrs.add(address)

    url = 'http://api.map.baidu.com/geocoder?output=json&key=你的API key'

    wh = open('address/list.txt', 'w', encoding="utf-8")
    for addr in addrs:
        addr_x = ''
        url_x = url + '&address=' + parse.quote(addr)
        # time.sleep(3)
        req = request.urlopen(url_x)
        res = req.read().decode()

        data = json.loads(res)

        if data['result']:
            location = str(data['result']['location']['lat']) + ', ' + str(data['result']['location']['lng'])
            url_x = url + '&location=' + parse.quote(location)

            req = request.urlopen(url_x)
            res = req.read().decode()

            data = json.loads(res)
            if data['result']:
                component = data['result']['addressComponent']
                addr_x = component['province'] + ' ' + component['city'] + ' ' + component['district']
        wh.write(addr + '\t' + addr_x + '\n')
    wh.close()

未完待续...

wxpython练手

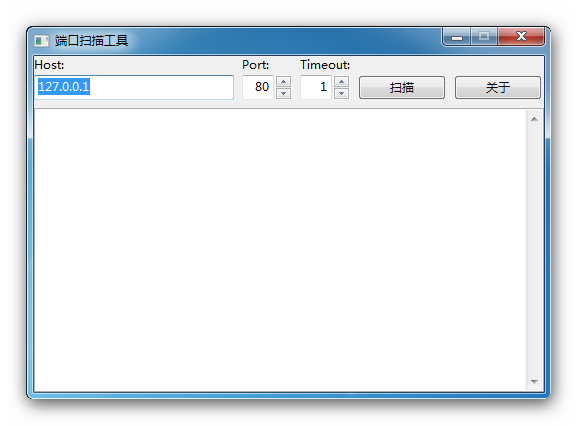
学习wxpython的练手软件,写的比较简单,名为扫描,实际上每次只能扫描一个端口。

PS:py2exe打包的程序伤不起啊,小小的一个程序,依赖库什么放进去竟有20多M。
setup里面设置的icon_resources居然没成功,不知道是不是哪儿写错了。

源码:下载

使用Stylus来写css

less sass stylus都可以用来简化css的书写,我选用stylus主要有以下几点原因:

  • Stylus is "pythonic"
  • stylus的语法看上去更像一门编程语言

其中有一点蛋疼的是,哥没找到怎么设置输出css的缩进字符,个人还是比较喜欢用tab缩进。安装完nodejs后安装stylus和nib

npm install stylus nib

Windows7的都安装到C:\Users\用户名\node_modules\stylus目录下了,使用nib的时候,要

stylus --include C:\\Users\\用户名\\node_modules\\stylus test.styl

nib库中定义好了很多常用的css,可以直接调用,方便很多。

python http server

前端调试的时候,有的时候需要网络环境,哥对bat不懂,自己就瞎凑了个代码出来,以下代码需要python3.x的支持。

@echo off
set port=8080
if not ""%1"" equ """" set port=%1
python -m http.server %port% | explorer http://localhost:%port%
@echo on

Supervisor安装及配置

Supervisor安装

# 安装
easy_install supervisor
# 生成默认配置文件
echo_supervisord_conf > /etc/supervisord.conf
mkdir /etc/supervisord.conf.d

修改配置文件

include区段修改为

[include]
files = /etc/supervisord.conf.d/*.conf

如需要访问web控制界面,inet_http_server区段修改为

[inet_http_server]
port=0.0.0.0:9001
username=username ; 你的用户名
password=password ; 你的密码

每个需要管理的进程分别写在一个文件里面,放在/etc/supervisord.conf.d/目录下,便于管理。例如:test.conf

[program:sqlparse]
directory = /var/www/python
command = /bin/env python test.py

将supervisord加入系统服务,以下代码来自gist,文件:/etc/init.d/supervisord

#!/bin/sh
#
# /etc/rc.d/init.d/supervisord
#
# Supervisor is a client/server system that
# allows its users to monitor and control a
# number of processes on UNIX-like operating
# systems.
#
# chkconfig: - 64 36
# description: Supervisor Server
# processname: supervisord

# Source init functions
. /etc/init.d/functions

RETVAL=0
prog="supervisord"
pidfile="/tmp/supervisord.pid"
lockfile="/var/lock/subsys/supervisord"

start()
{
        echo -n $"Starting $prog: "
        daemon --pidfile $pidfile supervisord -c /etc/supervisord.conf
        RETVAL=$?
        echo
        [ $RETVAL -eq 0 ] && touch ${lockfile}
}

stop()
{
        echo -n $"Shutting down $prog: "
        killproc -p ${pidfile} /usr/bin/supervisord
        RETVAL=$?
        echo
        if [ $RETVAL -eq 0 ] ; then
                rm -f ${lockfile} ${pidfile}
        fi
}

case "$1" in

  start)
    start
  ;;

  stop)
    stop
  ;;

  status)
        status $prog
  ;;

  restart)
    stop
    start
  ;;

  *)
    echo "Usage: $0 {start|stop|restart|status}"
  ;;

esac
chmod +x /etc/init.d/supervisord
chkconfig supervisord on
service supervisord start

oracle UTL_FILE包操作文件

利用UTL_FILE导出数据

-- 定义fhandle文件句柄
fhandle utl_file.file_type;
-- 打开文件
fhandle := utl_file.fopen(location => './', filename => 'export_' || to_char(sysdate, 'yyMMddHH24mi') || '.txt', open_mode => 'w', max_linesize => 32767);
-- 写入一行数据
utl_file.put_line(file => fhandle, buffer => 'test str');
-- 关闭句柄
utl_file.fclose(file => fhandle);